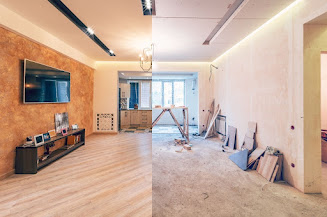
How to Create an Accent Wall ?
Accent walls are still popular in
the decorating industry. Because of their versatility, these simple and
attractive color accents will always be popular. You have an infinite number of
paint colors to choose from for your accent wall, as well as other surfaces and
materials. Even the placement of your accent wall is entirely subjective.
Because your home is one-of-a-kind, your accent wall should be as well. Accent
walls can be employed in any room if you understand the important dos and
don'ts.
Note: Please keep in mind that
these instructions are universal and can be used to any pattern of wall paneling
– they are not exclusive to my particular paneling design. So, regardless of
the sort of paneling you choose to install (squares, straight board, and
batten, herringbone, or something altogether different), the essential
"how-to" instructions are the same.

What Exactly Is an Accent Wall?
An accent wall is a wall that is
different from the other walls around it in terms of color, shape, design, or
material.
To begin, consider which patterns and designs you prefer, as well as the colors you intend to use. The colors will vary according to the room specification, such as the living room, bedroom, and so on. After you've finalized the pattern, measure your wall and draw it on a piece of paper so you can see it.

If you're completing this design by yourself, start by
drawing the exact lines on the wall with an HB pencil. Alternatively, you might
direct the work of your carpenter. After you've marked the right guidelines,
you may visualize your pattern on the wall, and if there are some changes make that
changes at that moment.
So we utilized wooden beading Patti for the accent wall; you can
also use this beading or molding Patti; it is used according to your style and
what you are constructing.

The dimension of the beading Patti was 35 x 8mm, and the
height was around 7ft. After that, we simply positioned the beading Patti on
our previously created parameters. We used screws to secure the beading Patti;
keep in mind that when you secure the Patti, the screws must be large enough to
go into the walls for at least 15mm. Keep in mind that while you are repairing
the beading Patti, the joint must be on the bottom side rather than the top. To
disguise the junction, we started fixing the Patti from the top so that the
joints would come down and not be apparent.
After fixing the pattern on the wall you can see something like
this as you can see the image.

After that, simply smooth the surface with a hand plainer to
ensure that the joints are all at the same level. The next task is to work with
Painter. If you want your beaded Patti to be the same color as the wall finish,
you must first apply to whiten and then scrub with sandpaper. The Patti will be
finished in the same manner as the wall as a result of this technique.
We used Asian paints royale aspira for the wall color, but
you can use any color and brand you want. We added two coats of paint to the
wall, and it is now complete.

Let us know in the comments if you learned anything new from
this blog. Share this blog with your friends so they can learn and apply this
process in their houses. You can join our telegram channel @trishnadesign so
that you will get notifications from our various social media platforms.


ReplyDeleteI would like to suggest for Destiny Seatings - leading canteen furnitures suppliers in Gurgaon. For more details, visit
office furniture in India | office furniture | office furniture Supplier | office furniture Manufacturer in India | office furniture Manufacturer